How To Install Wordfence Security For Your WordPress Website?
Those who are new WordPress owners, you supposedly have heard about Wordfence quite a lot. Do you know what this actually is? Wordfence is basically a security plugin for WordPress using Websites. The next question that must be coming to your mind is How To Install Wordfence Security For The WordPress Websites?
Quick Links
Now, this is the point where you require a detailed explanation, and that is why you are here, am I right? Well, I am sure this post would pique your interest in installing Wordfence Security to ensure the protection of your WordPress website.
What Is Wordfence Security?

One of the most popular security plugins for WordPress Websites is Wordfence. However, undoubtedly it is much more than just a plugin. You might be surprised to know that Wordfence has a malware scanner as well as an endpoint firewall. Together, these two dedicatedly act as “bodyguards” of the WordPress Websites.
So if you want an ultimate solution for your websites using WordPress, Wordfence should be your only destination. With several other additional features like 2FA and others, it is definitely one of the most comprehensive choices.
Would you like to take a little sneak peek into the history of WordPress? Between 2011 to 2012, the developers started deciding the initial version of Wordfence. The features that were incorporated in the preliminary versions were:
- Brute Force Function
- 2-Factor Authentication
- Safety from the violent crawlers
- Malware scanning
- Scheduled scans
How Does The Wordfence Firewall Function?
By now, you must have got a brief glimpse of the WordPress websites. Now your mind is surely asking for deeper insights on how Wordfence Firewall works. To be very precise, the functionalities of Wordfence are quite complex and extensive but understanding this would benefit you in many aspects.
So without any further ado, let’s check out its key functions in the following section:
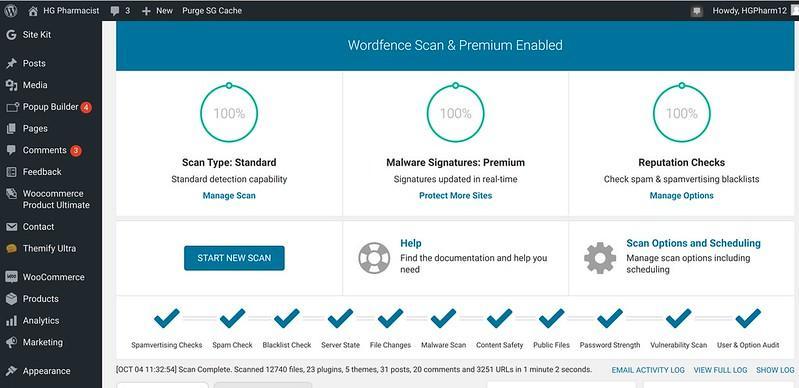
- WordFence Dashboard: Have you ever tried to know what is there in the Wordfence dashboard? Alerts, global options, and many others provide rich insights into the website’s ongoing security condition.
- Blocking: This is one of the best facilities that Wordfence provides. With the custom features like Blocking Troubleshooting and Country blocking, you can add extra layers of privacy. This is simply an incredible one outstanding feature that you would hardly find in other similar tools.
- Scanning: Are you trying to detect suspicious shells or codes on your website? Not to worry because Wordfence is there for you. By scanning your site with it, you can identify malicious threats. Some of the incredible attributes you can get here are scan results, scan scheduling, and scan options.
- Wordfence Central: Wordfence Central is one highly efficient and robust platform to coordinate many WordPress website’s security. The most impressive thing about it is you can do this task on multiple websites using a single interface.
Particularly, the user dashboard page, configuration page, settings page, and Wordfence central teams are some top responsibilities it carries.
- Tools: Wordfence uses a plethora of tools that give a touch of innovation to the users. For instance, password audit, Whois Lookup, Diagnostics, Import and Export, Real-time live traffic and Two Factor Authentication.
Wanna get a slice of happiness? The premium version of Wordfence includes blocking all the requests from IP addresses that continuously attack your websites.
How To Install Wordfence Firewall For Your WordPress Website?
Now, this is the part for which you have been waiting for so long – how to install Wordfence Firewall For Your WordPress Website? Keep reading the below section to know what steps you should follow to install and set up WordPress websites:
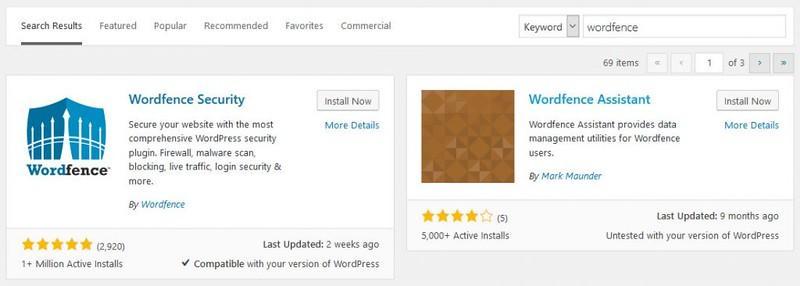
1. Install the Wordfence security Plugin at first on your system and activate it.
2. After activation, you will see a new label called Wordfence on the WordPress Admin Bar.
3. Tap this, and you will go to the Wordfence dashboard.
4. You will be able to see different default sections within the WordPress settings, although, at times, you still need to change them.
5. To set up the Wordfence Firewall, all you need to do is Navigate To Wordfence Firewall Page and then hit the option Optimize Firewall Button.
6. Some diagnostic tests will run in the background
7. Tap on the button – Continue
8. Once Wordfence asks you to download a file; you have to download the .htaccess file.
9. After getting redirected to the firewall page, you will visualize your security to be at the “Extended protection” level.
10. After 7 days of usage, the “learning mode” button would change to “Enabled and Protecting” mode.
And there you go, all ready to shield your website from the notorious attacks and threats. Now you can govern your websites freely without the tension of sudden wrong performances.
Summary
Now that you know how to install Wordfence for WordPress along with a myriad of information about it, what are you waiting for? Install it right now and protect your sites from today. If needed, revise the steps above once again. Who knows what threat is waiting for your webpage every single moment.
Was this post intriguing enough to satisfy your knowledge hunger about Wordfence? Let us know your feedback or opinion about this guide in the comment section. We will be more than happy to see your valuable viewpoints.
Author Bio:
Jais Frank is a freelance content writer and enthusiastic blogger. He is the co-founder of

Dream Land Estate. He contributes to many authority blogs such as Emblem Wealth and Online Marketing Tools. He also likes to write in many international magazines and journals.
Why WooCommerce is the Best Choice for Your Online Store?
WooCommerce stands out as a top option for anyone looking to build an online store. This platform…
0 Comments8 Minutes
How to Use AI-Powered SEO Tools for WordPress eCommerce
SEO is a critical factor in the success of any e-commerce WordPress store. As competition…
0 Comments11 Minutes
Why Short-Form Videos Are the Future of Content Marketing
Your Instagram customers spend over 50% of their time watching short-form videos and reels. Rather…
0 Comments12 Minutes
The Role of Digital Marketing in Business Growth
Online marketing touches every aspect of a business, whether it is initiating the idea or for an…
0 Comments3 Minutes
AI Meets Authenticity: Balancing Automation and Human Touch in Content Marketing
Is your brand starting to sound like a robot? In a world where algorithms write faster than any…
0 Comments8 Minutes
Essential Tools for Enhancing Web Design and UX Hosting
Have you ever visited a website that felt slow, clunky, or confusing? A website that is poorly…
0 Comments11 Minutes
How a Mini Cart Transformed My Store’s Shopping Experience
Okay, real talk—running an online store is hard. You think you’ve got everything figured out, you…
0 Comments9 Minutes
Balancing Your Security Initiatives With Industry Compliance Requirements
Managing a business today comes with a number of daily battles that need to be fought. Resources…
0 Comments11 Minutes


